✓ Building your own gaming PC can save you money compared to pre-builts.
✓ It offers unparalleled customization and upgradeability.
✓ The process is more straightforward than many first-timers imagine.
✓ Understanding components improves troubleshooting and future upgrades.
How It Works
1
Plan Your Build & Gather Components
Research and select compatible components based on your budget and performance goals. Ensure all parts are ordered and arrive before you begin assembly.
2
Assemble Core Components
Install the CPU, cooler, RAM, and M.2 SSD onto the motherboard outside the case. This pre-assembly step simplifies installation into the PC case.
3
Mount in Case & Connect Power
Carefully install the assembled motherboard into the PC case, secure it, and then mount the power supply. Connect the main power cables to the motherboard and components.
4
Install GPU & Peripherals
Mount your graphics card, connect any additional storage drives, and route all cables neatly. Finally, connect your monitor, keyboard, and mouse for initial setup.
Understanding Gaming PC Components: The Foundation of Your Rig
Photo: Djenz Van Eysendeyk / Pexels
Embarking on the journey of how to build a gaming PC begins with a thorough understanding of its core components. Think of each part as a vital organ in a high-performance athlete, each playing a crucial role in delivering the ultimate gaming experience. The beauty of building your own PC lies in the ability to hand-pick every single piece, tailoring your machine precisely to your needs, budget, and aesthetic preferences. This initial phase, often called component selection, is arguably the most critical. It’s where you define the power, speed, and longevity of your future gaming powerhouse.
First and foremost, we have the Central Processing Unit (CPU), often dubbed the 'brain' of the computer. For gaming, you'll want a modern multi-core processor from either Intel (e.g., Core i5, i7, i9) or AMD (e.g., Ryzen 5, 7, 9). The CPU dictates how well your system handles complex calculations, AI, and game physics. A higher core count and clock speed generally translate to better performance, especially in CPU-intensive games or when multitasking. Paired with the CPU is the Motherboard, the 'nervous system' that connects all components. It must be compatible with your chosen CPU (check socket type like LGA1700 for Intel or AM5 for AMD) and support your desired RAM type (DDR4 or DDR5) and speed, as well as the number and type of storage drives you plan to use. Don't skimp on the motherboard; a good one provides stability, features, and room for future upgrades. Choosing the right motherboard can significantly impact your PC's potential.
Next up is the Graphics Processing Unit (GPU), the undisputed 'heart' of any gaming PC. This is where the majority of your gaming budget should be allocated, as the GPU renders all the visuals you see on your screen. NVIDIA's GeForce RTX series and AMD's Radeon RX series are the dominant players. When selecting a GPU, consider its VRAM (video memory), core count, and clock speed. Higher-end cards offer better frame rates, higher resolutions (1440p, 4K), and enable advanced features like ray tracing. Your choice here will directly impact your gaming fidelity and performance for years to come. Don't forget the RAM (Random Access Memory), which acts as your PC's short-term memory. For modern gaming, 16GB of DDR4 or DDR5 RAM is the sweet spot, with 32GB becoming increasingly popular for enthusiasts or those who stream while gaming. Faster RAM speeds (measured in MHz) can offer marginal performance gains, but capacity is generally more important.
Storage is another key player. Solid State Drives (SSDs) are now the standard for gaming, offering significantly faster load times than traditional Hard Disk Drives (HDDs). NVMe M.2 SSDs are the fastest, connecting directly to the motherboard via PCIe lanes. A 1TB NVMe drive is a great starting point for your operating system and primary games, with larger capacities or a secondary SATA SSD or HDD for additional storage. Finally, the Power Supply Unit (PSU) provides the necessary electricity to all your components. It’s crucial to choose a PSU with sufficient wattage (check online calculators based on your components) and a good efficiency rating (e.g., 80 Plus Bronze, Gold, Platinum). Never underestimate the importance of a reliable PSU; a cheap or underpowered one can lead to system instability or even component damage. The PC Case houses all these components, offering airflow, aesthetics, and cable management options. Choose one that accommodates your motherboard size, GPU length, and desired cooling solutions. Thoughtful component selection lays the groundwork for a successful and satisfying gaming PC build.
Step-by-Step Assembly: Bringing Your Gaming PC to Life
Photo: Ron Lach / Pexels
With all your carefully selected components at hand, the exciting phase of how to build a gaming PC truly begins: the assembly. While it might seem daunting at first, breaking down the process into manageable steps makes it incredibly straightforward. Always start by preparing your workspace. Ensure it’s clean, well-lit, and, most importantly, anti-static. Use an anti-static wrist strap or periodically touch a grounded metal object to discharge any static electricity, which can damage sensitive components. Unpack your motherboard and place it on its anti-static bag on a non-conductive surface.
The first critical installation is the CPU. Carefully open the CPU socket lever on the motherboard. Align the triangular or arrow marker on the CPU with the corresponding mark on the socket. Gently place the CPU into the socket; it should drop in without any force. Do NOT push or force it. Once seated, close the lever to secure it. Next comes the CPU cooler. If you’re using the stock cooler that came with your CPU, it often has pre-applied thermal paste. If not, apply a small pea-sized dot of thermal paste to the center of the CPU's heat spreader. Then, mount the cooler according to its instructions, ensuring even pressure. For AIO (All-in-One) liquid coolers, you'll install the block on the CPU and the radiator and fans into the case later.
RAM installation is usually next. Open the retention clips on the motherboard's RAM slots. Align the notch on the RAM stick with the notch in the slot. Press down firmly on both ends of the RAM stick until the clips snap into place. You should hear a click. If you're using two sticks, refer to your motherboard manual for the correct slots for dual-channel operation (usually slots 2 and 4, or 1 and 3). Now, it's time for the NVMe M.2 SSD. Locate the M.2 slot on your motherboard, usually covered by a heatsink. Unscrew the small standoff and screw. Insert the M.2 drive at an angle into the slot, then gently push it down and secure it with the screw. Replace the heatsink if applicable.
With these core components installed on the motherboard, it’s time to move to the PC case. Remove both side panels of your case. Install the motherboard standoffs if they aren't pre-installed. Carefully lower the motherboard into the case, aligning the screw holes with the standoffs and ensuring the I/O shield (if not integrated with the case) is properly seated. Secure the motherboard with screws. Next, install the Power Supply Unit (PSU) into its designated bay, typically at the bottom or rear of the case, and secure it with screws. Begin connecting the main power cables: the 24-pin ATX power cable to the motherboard and the 8-pin (or 4+4-pin) CPU power cable to the top-left of the motherboard. Route these cables neatly through the case's cable management grommets.
The Graphics Card (GPU) is next. Open the PCIe slot latch where your GPU will go (usually the top-most x16 slot). Remove the corresponding PCIe slot covers from the back of your case. Align the GPU with the slot and push down firmly until it clicks into place and the latch closes. Secure it with screws to the case. Connect the appropriate PCIe power cables from your PSU to the GPU. Finally, connect any additional storage drives (SATA SSDs/HDDs) with SATA data and power cables. Connect front panel connectors (USB, audio, power/reset buttons, and LED indicators) to the motherboard, referring to your motherboard manual carefully for correct pin alignment. This step-by-step process ensures a smooth and successful build, transforming a collection of parts into a powerful gaming machine.
First Boot, Operating System, and Optimization for Gaming Performance
Photo: Isabella Mendes / Pexels
After meticulously assembling all the components, the moment of truth arrives: the first boot. This stage is crucial for how to build a gaming PC, as it confirms that all your efforts have resulted in a functional machine. Before powering on, double-check all cable connections. Ensure the 24-pin ATX, CPU power, GPU power, and front panel connectors are securely seated. Connect your monitor to the graphics card (NOT the motherboard's video output unless you have an APU), and plug in your keyboard and mouse. Take a deep breath, hit the power button on your case, and watch for signs of life: fans spinning, RGB lights illuminating, and most importantly, a display signal on your monitor. If you get no signal, don't panic. Common troubleshooting steps include re-seating RAM, checking GPU power, and ensuring the monitor input is correct. Troubleshooting PC build issues can save a lot of headaches.
Once you see a display, you'll likely enter the BIOS (Basic Input/Output System) or UEFI (Unified Extensible Firmware Interface). This is your motherboard's firmware, where you can configure fundamental system settings. Your first task here is to ensure all components are recognized (CPU, RAM, storage drives). If your RAM is rated for speeds higher than the default (e.g., 3200MHz, 3600MHz), enable the XMP (Extreme Memory Profile) or DOCP (Direct Overclock Profile) setting to run it at its advertised speed. Save and exit the BIOS. Now, it's time to install the Operating System (OS). For gaming, Windows 10 or Windows 11 is the standard. You'll need a USB drive with a bootable Windows installation media, which you can create using Microsoft's Media Creation Tool on another computer. Insert the USB, reboot your PC, and boot from the USB drive (you might need to select it from a boot menu in BIOS).
Follow the on-screen prompts to install Windows. During installation, you'll be asked to select a drive; choose your primary NVMe SSD. Once Windows is installed and you've completed the initial setup, the real optimization begins. The very first step is to install the latest drivers. Start with your motherboard chipset drivers, which you can download from your motherboard manufacturer's website. Next, download and install the latest graphics drivers from NVIDIA or AMD's official websites. These are absolutely critical for gaming performance. Don't rely solely on Windows Update for these; always get them directly from the source. Install any other necessary drivers for peripherals or network adapters.
Beyond drivers, several Windows settings can be optimized for gaming. Go to 'Settings > System > Display > Graphics settings' and ensure 'Hardware-accelerated GPU scheduling' is enabled. In 'Settings > Gaming > Game Mode', turn on Game Mode. For power settings, navigate to 'Control Panel > Hardware and Sound > Power Options' and select a 'High Performance' or 'Ultimate Performance' plan. Regularly update your drivers and Windows, keep your system free of unnecessary background applications, and monitor your temperatures using software like HWMonitor or MSI Afterburner to ensure optimal performance and longevity. With these steps, your custom-built gaming PC will be ready to deliver an immersive and high-fidelity gaming experience.
Essential Tips and Common Mistakes to Avoid When Building Your PC
Photo: Andrey Matveev / Pexels
Building a gaming PC is a rewarding experience, but navigating the process requires attention to detail. Knowing essential tips and anticipating common mistakes can save you time, frustration, and potentially costly errors. One of the most crucial tips is to research thoroughly before purchasing any components. Ensure compatibility between your CPU and motherboard socket, RAM type (DDR4 vs. DDR5), and PSU wattage for your chosen GPU. Websites like PCPartPicker.com are invaluable for checking compatibility and estimating power consumption. Don't rush into buying the latest and greatest without considering your actual needs and budget. A balanced build, where no single component bottlenecks the others, will always provide a better experience than an overpowered GPU paired with an outdated CPU.
Another vital tip is to manage your cables effectively. Good cable management isn't just for aesthetics; it significantly improves airflow within your case, leading to better cooling and overall system stability. Utilize the routing channels, Velcro straps, and zip ties often provided with your case or PSU. Plan your cable runs before you start connecting everything. A common mistake here is connecting only the visible cables and leaving a tangled mess behind the motherboard tray, which can impede airflow and make future upgrades or troubleshooting a nightmare. Always connect all necessary power cables, including the 24-pin motherboard power, 8-pin CPU power, and any required PCIe power connectors for your GPU. Missing a connection or not fully seating it is a frequent cause of a PC failing to boot.
When handling components, especially the CPU and RAM, always be mindful of static electricity. Invest in an anti-static wrist strap or at least frequently touch a grounded metal object (like your PC case's bare metal) before touching components. Electrostatic discharge (ESD) can permanently damage sensitive electronics, and often the damage isn't immediately apparent. Another common pitfall is over-tightening screws. Components like the CPU cooler or motherboard should be secured firmly but never with excessive force. Overtightening can strip screws, damage threads, or even crack delicate PCBs. Similarly, when installing the CPU, never force it into the socket. If it doesn't drop in easily, recheck the alignment marks. Forcing it can bend pins, rendering the CPU or motherboard unusable.
Finally, don't forget about thermal paste. If your CPU cooler doesn't have it pre-applied, you must apply a small amount (pea-sized dot or a thin line) to the center of your CPU's heat spreader before mounting the cooler. Too little or too much can hinder heat transfer. After assembly, take your time with driver installation and initial setup. Install motherboard chipset drivers first, then GPU drivers directly from the manufacturer. Skipping this step or relying on generic drivers will severely limit your gaming performance. By following these tips and avoiding these common mistakes, your journey on how to build a gaming PC will be much smoother and more successful, resulting in a stable and high-performing machine.
Comparison
Feature
DIY Gaming PC
Pre-built Gaming PC
Gaming Laptop
Customization
✓ (Full Control)
✗ (Limited Options)
✗ (None)
Upgradeability
Excellent (Modular)
Limited (Proprietary Parts)
Very Limited (RAM/Storage Only)
Cost-Efficiency
Often Lower (Performance/Dollar)
Higher (Convenience Premium)
Highest (Portability Premium)
Performance/Cooling
Best (Optimized Airflow/Liquid)
Good (Case Dependent)
Compromised (Thermal Throttling)
Assembly Difficulty
Moderate (Requires Time/Patience)
None (Ready-to-Use)
None (Ready-to-Use)
What Readers Say
★★★★★
"This guide was a lifesaver! I always thought building a PC was beyond me, but the step-by-step instructions made it so clear. My new gaming rig runs FFXIV beautifully."
Alex C. · Seattle, WA
★★★★★
"I followed this guide and built my first gaming PC last weekend. The component breakdown was incredibly helpful for choosing parts, and I saved hundreds compared to a pre-built."
Brenda L. · Austin, TX
★★★★★
"My custom-built PC, thanks to this guide, now consistently hits 144+ FPS in Valorant and Apex Legends. The cable management tips really helped keep things clean and cool."
Chris D. · Miami, FL
★★★★★
"The guide was mostly fantastic, though I did run into a minor issue with my front panel connectors not booting properly. A quick re-read of the motherboard manual and this article's troubleshooting section helped me fix it. Still, a great resource!"
Dana M. · Denver, CO
★★★★★
"As a streamer, I needed a PC that could handle gaming and encoding simultaneously. This guide on how to build a gaming PC helped me select powerful components and assemble a beast of a machine that handles both tasks without breaking a sweat."
Ethan P. · Chicago, IL
Frequently Asked Questions
Is it really cheaper to build my own gaming PC?
In most cases, yes, building your own gaming PC can be significantly cheaper than buying a comparable pre-built system. You pay for labor and brand markup with pre-builts. By building, you get more performance per dollar, often allowing you to invest more in core components like the GPU or CPU.
Is building a gaming PC difficult for a beginner?
While it requires patience and attention to detail, building a gaming PC is much easier than it seems. Modern components are designed to be user-friendly, and there are countless guides (like this one!) and video tutorials available. You don't need advanced technical skills, just a methodical approach.
How long does it take to build a gaming PC?
For a first-timer, the actual assembly process can take anywhere from 2 to 6 hours, depending on your familiarity and the complexity of the build (e.g., custom liquid cooling takes longer). However, the planning and component selection phase can take much longer, often several days or weeks of research.
What's the most important component for gaming performance?
The Graphics Processing Unit (GPU) is overwhelmingly the most crucial component for gaming performance. It directly impacts your frame rates, resolution capabilities, and visual fidelity. Allocate the largest portion of your budget to the GPU for the best gaming experience.
Should I buy a pre-built gaming PC instead of building one?
A pre-built PC offers convenience and a warranty for the entire system, making it suitable for those who want a plug-and-play experience. However, building your own provides superior customization, better value, and the satisfaction of creating your machine, along with easier upgrades down the line. The choice depends on your priorities.
Who should consider building a gaming PC?
Anyone looking for maximum performance for their budget, specific customization options, a deeper understanding of their hardware, or the satisfaction of a DIY project should consider building a gaming PC. It's ideal for enthusiasts, upgraders, and budget-conscious gamers.
What are the risks of building a PC incorrectly?
The main risks include damaging components (e.g., bent CPU pins, static discharge), components not working due to improper installation (e.g., loose cables, incorrect RAM seating), or system instability from incompatible parts. However, these risks are minimized by careful planning and following detailed guides.
What future trends should I consider when building a PC?
Consider future-proofing for PCIe 5.0 (for GPUs and SSDs), DDR5 RAM, and higher core count CPUs, as these technologies are becoming standard. Also, factor in power supply wattage for potential GPU upgrades and case airflow for better cooling as component power consumption tends to increase.
You're now equipped with the knowledge and confidence to embark on your own journey of how to build a gaming PC. This rewarding process not only saves you money but also grants you a machine perfectly tailored to your gaming desires. Dive in, take your time, and enjoy the unparalleled satisfaction of powering on your very own custom-built gaming rig.

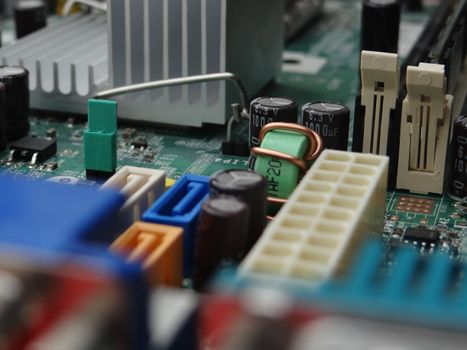 Photo: Djenz Van Eysendeyk / Pexels
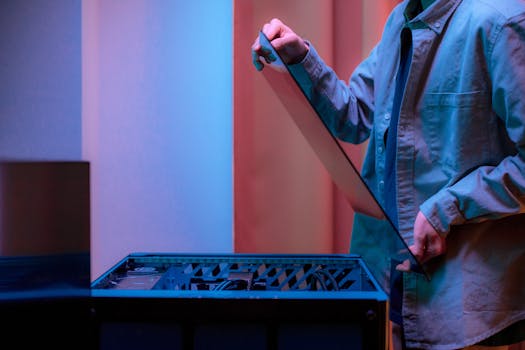 Photo: Ron Lach / Pexels
 Photo: Isabella Mendes / Pexels
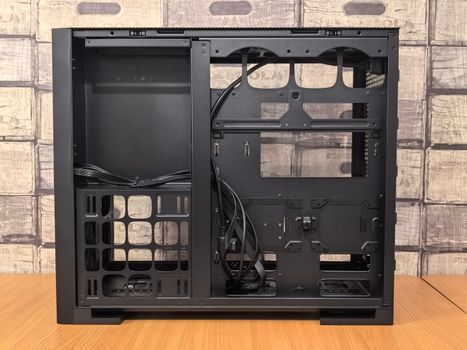 Photo: Andrey Matveev / Pexels